Try one of these low-effort DIY updates to refresh your home in just a few hours.
Consider our easy, one‑day decorating projects that bring major personality without the massive effort. There’s a stylish update for nearly every room in your home.
1. Greet Guests with a DIY Doormat
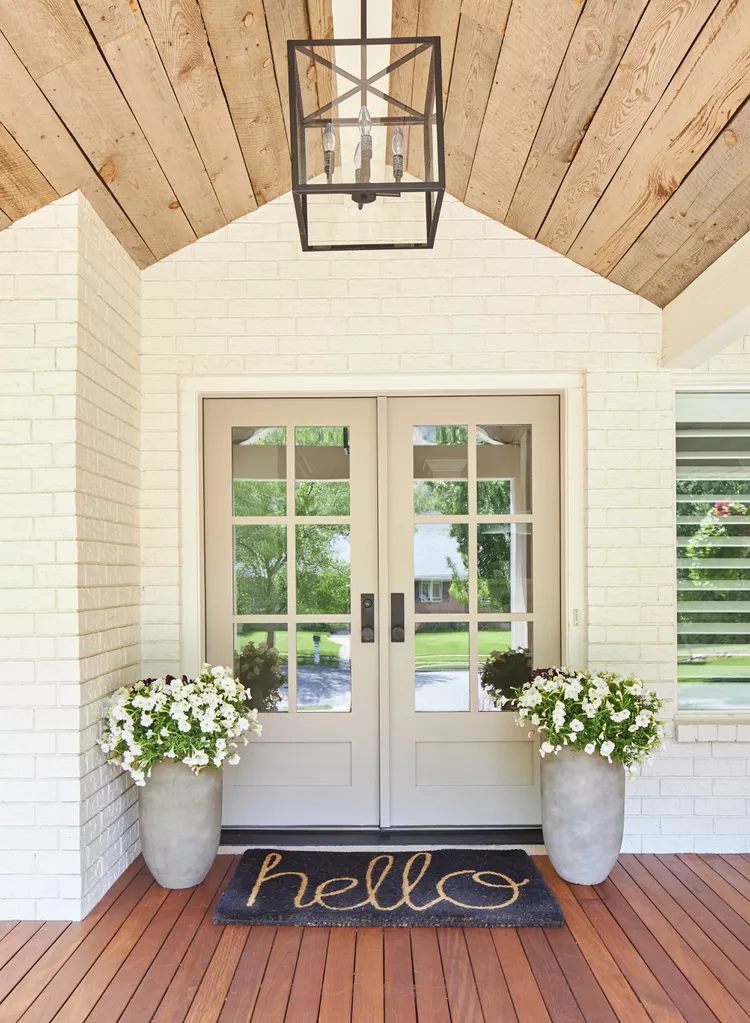
source: bhg.com
Personalize your entry with a custom doormat. Cut a word or image from cardstock to use as a stencil. Paint over it, then seal with spray to protect your design from fading or wear.
2. Install New Lighting
source: bhg.com
Refresh your space instantly by updating lighting. Sconces can be compact and don’t always need hardwiring. Opt for plug-in models or battery-operated puck lights for easy installation.
3. Paint an Ombre Accent Wall
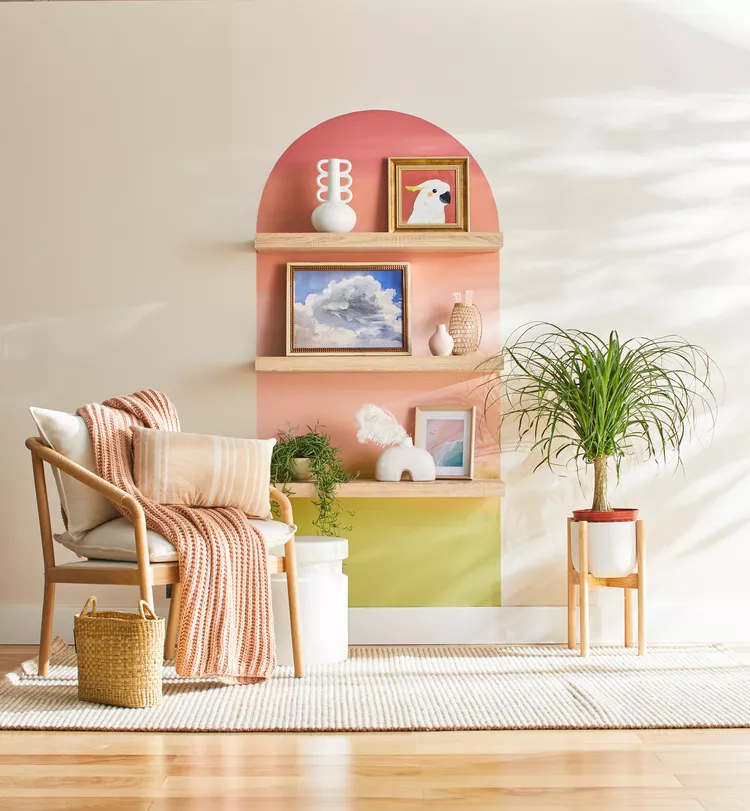
source: bhg.com
Turn a plain wall into a softly gradated ombre arch. Tape off the area using painter’s tape, paint on three colors in layers, and let each dry thoroughly before moving on.
4. Build a Room Divider
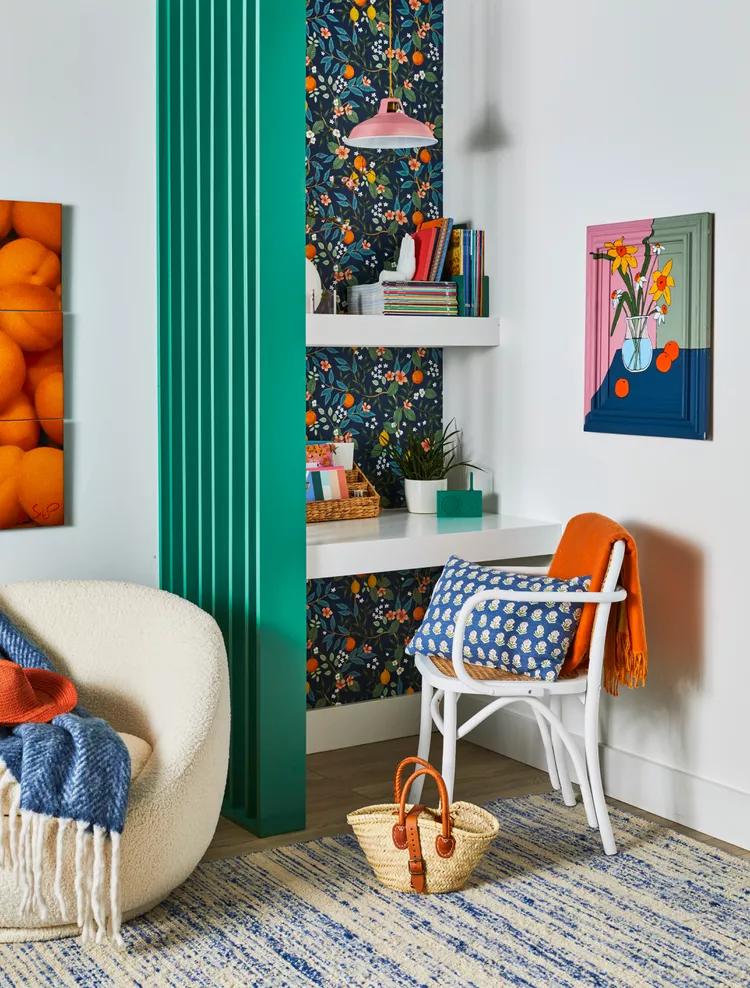
source: bhg.com
Create a DIY divider using ten boards. Build a frame using two long and two short boards, then add and attach the remaining vertical slats. Secure it between the floor and ceiling using wood screws.
5. Try a Pegboard Wall
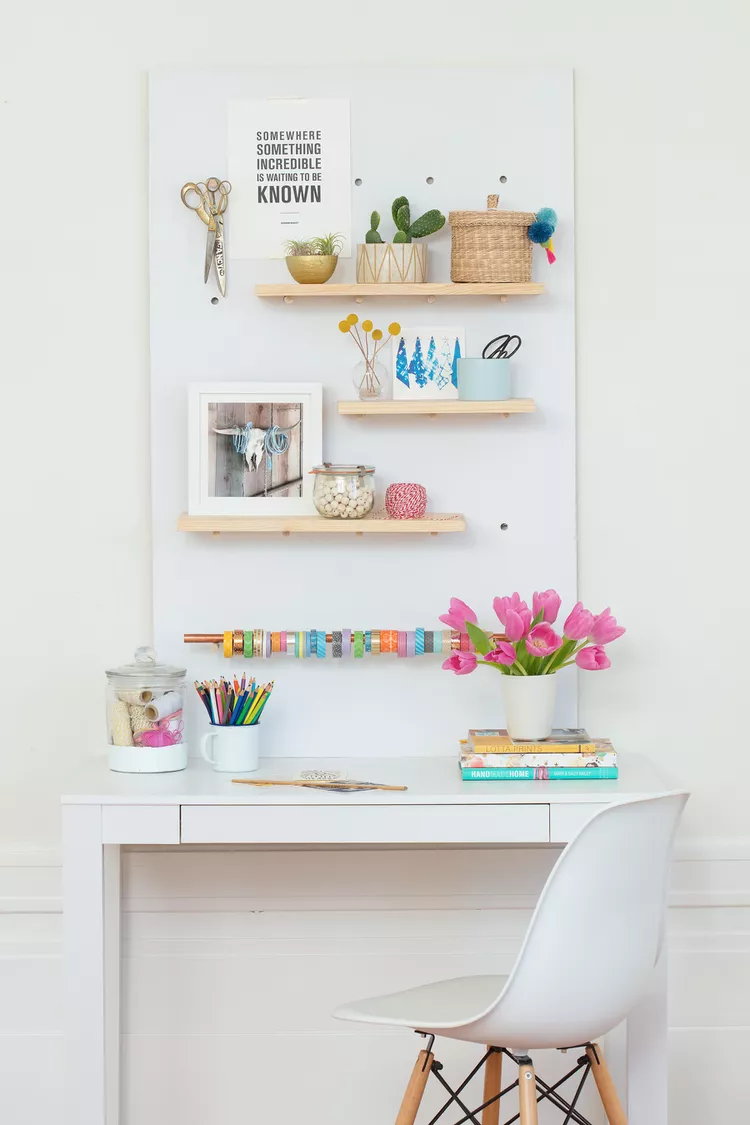
source: bhg.com
Design a pegboard that’s tailor-made to your space. Drill holes in plywood in a grid, insert dowels for handy storage, and paint it to fit in or be decorative wall art that stands out.
6. Make Stamped Canvas Art
source: bhg.com
Skip the store—make modern art yourself using materials you have around the house. A canvas, a drywall mud masher, and leftover paint are all you need to create a chic stamped design.
7. Build a Living Wall

source: bhg.com
Turn old cutting boards into a living wall of plants. Attach boards with D-ring hardware and insert succulents or air plants—an easy style update that’s perfect for sunny spots.
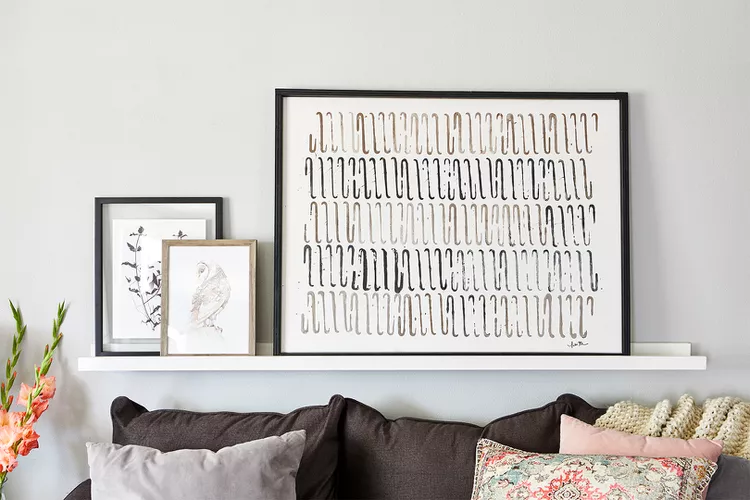
8. Build Picture Ledges
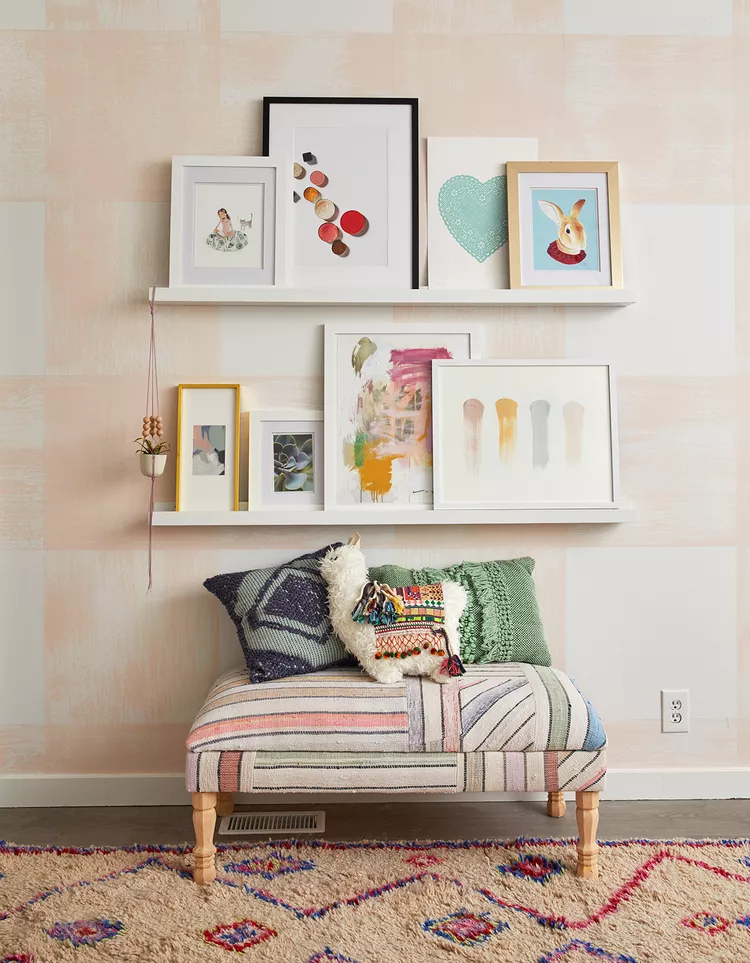
source: bhg.com
Build simple photo ledges from 1×4 boards—perfect for displaying artwork and photos that you can switch out whenever you want. Paint to match your decor.
9. Use Removable Wallpaper
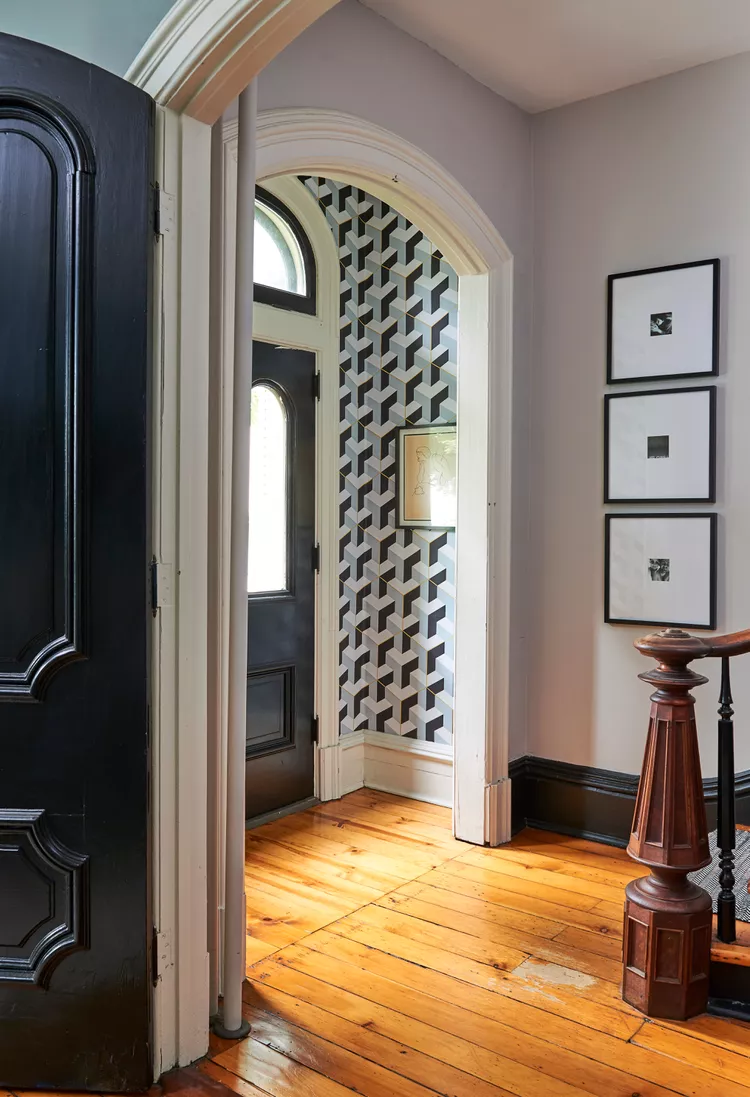
source: bhg.com
Add pattern and texture using peel-and-stick wallpaper. Choose an accent wall that shares at least one color with the room. Paint walls first, then apply wallpaper for easy removal later.
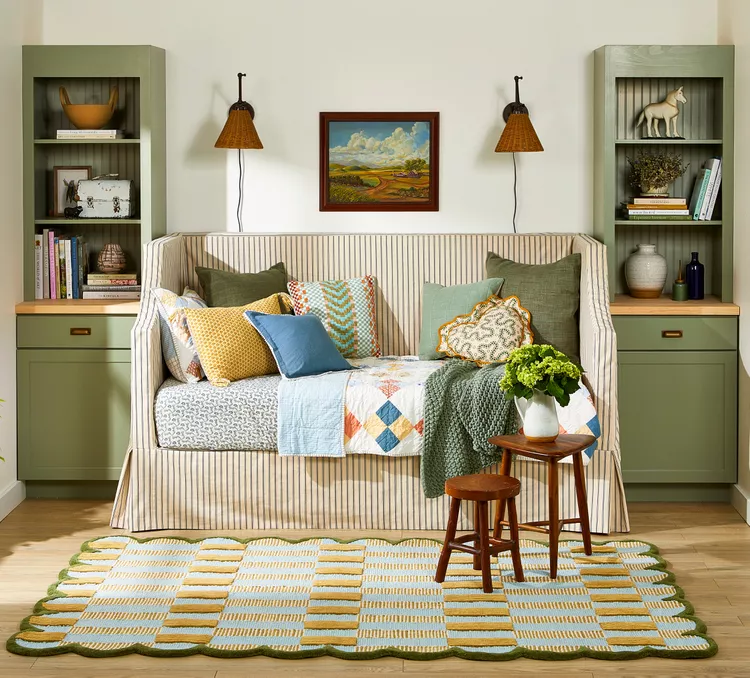
10. Build a Wall‑Mounted Nightstand
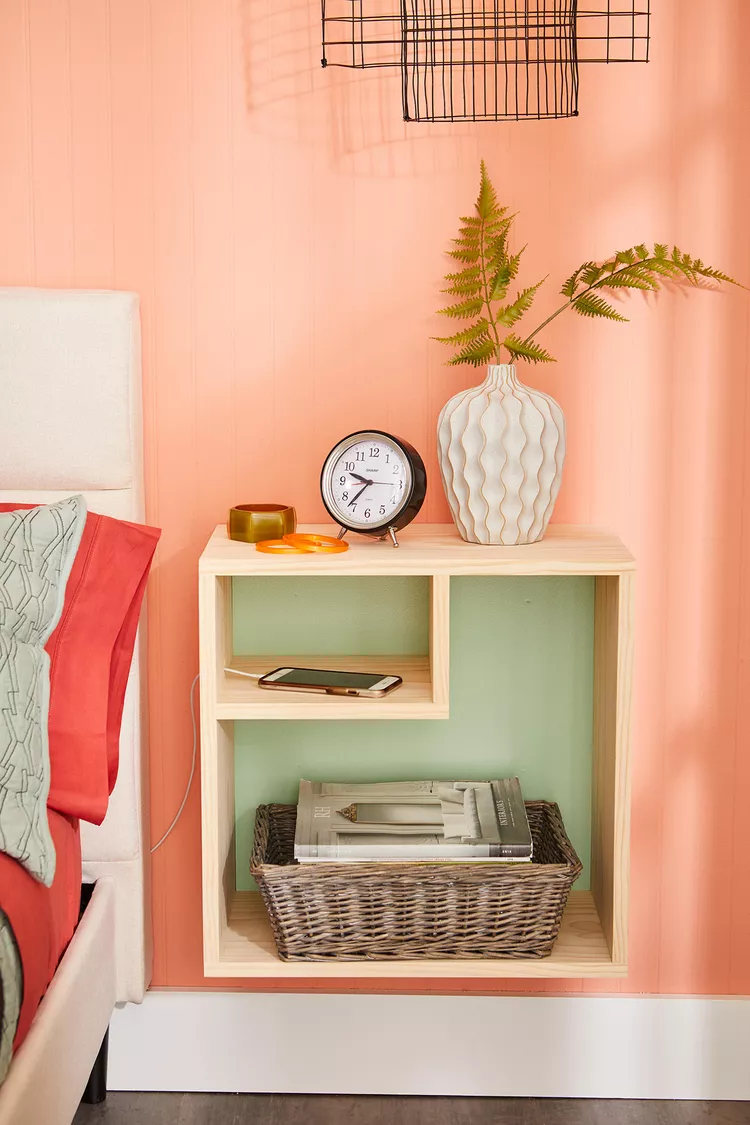
source: bhg.com
Create floor space by building a floating nightstand. Leave room underneath for storage, and incorporate a slot for phone charging cords in one smart design.
11. Install a Wood Accent Wall
source: bhg.com
Create modern texture with 2×4-foot plywood panels in a staggered installation. Leave the wood grain exposed—no need to paint. Vary panel sizes for personalized visual interest.
12. Give a Dresser a New Identity
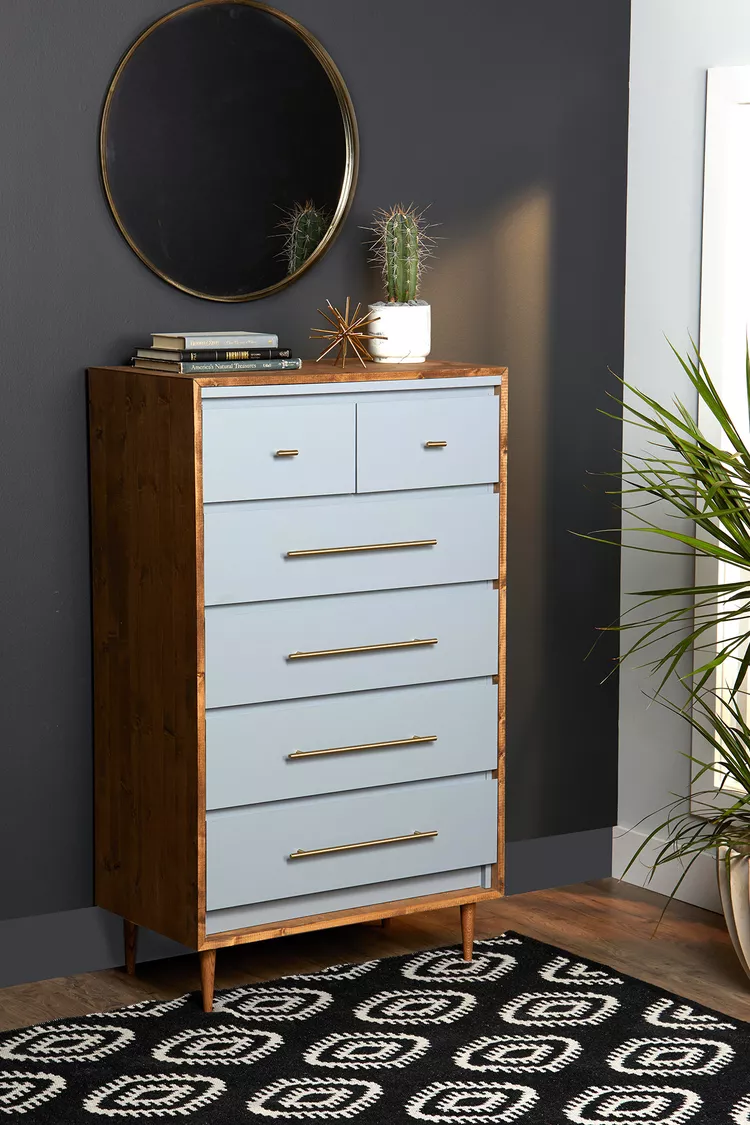
source: bhg.com
Give an IKEA Malm dresser a new identity with the addition of stained wood panels, a frame repaint, and the installation of new hardware for a custom update.
13. Build a Plant Stand
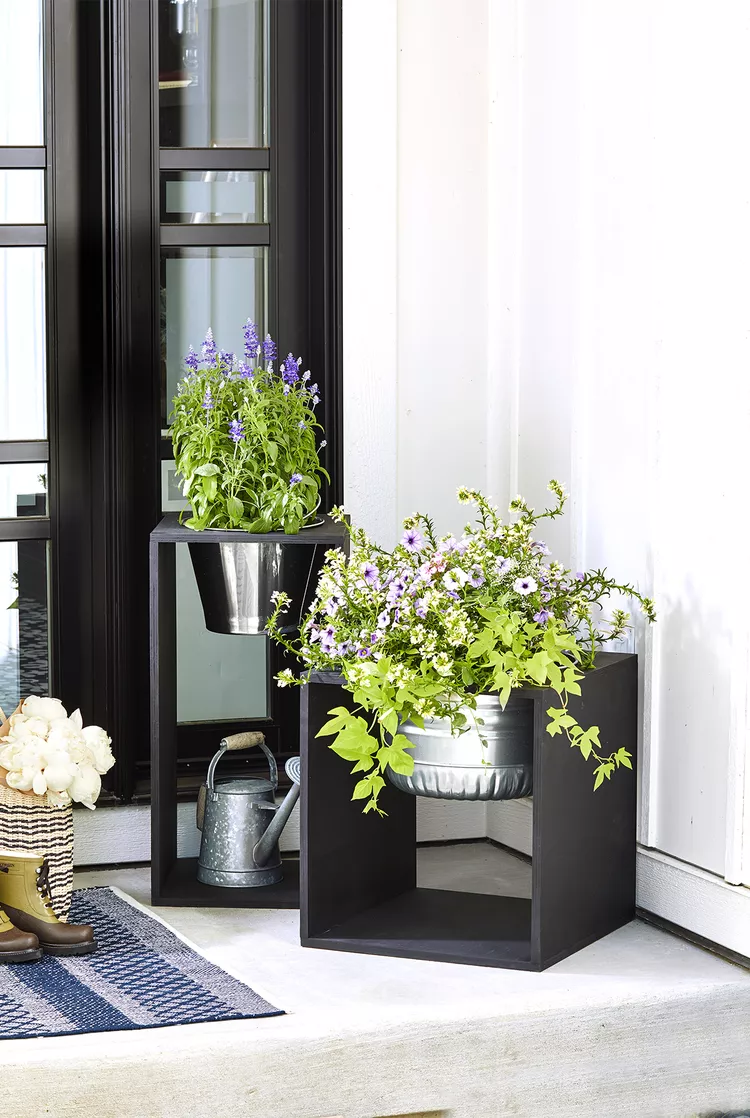
source: bhg.com
Construct a contemporary plant stand with only four boards and simple tools. Stain or paint to coordinate with your porch or interior design.
14. Paint Minimalist Wall Art
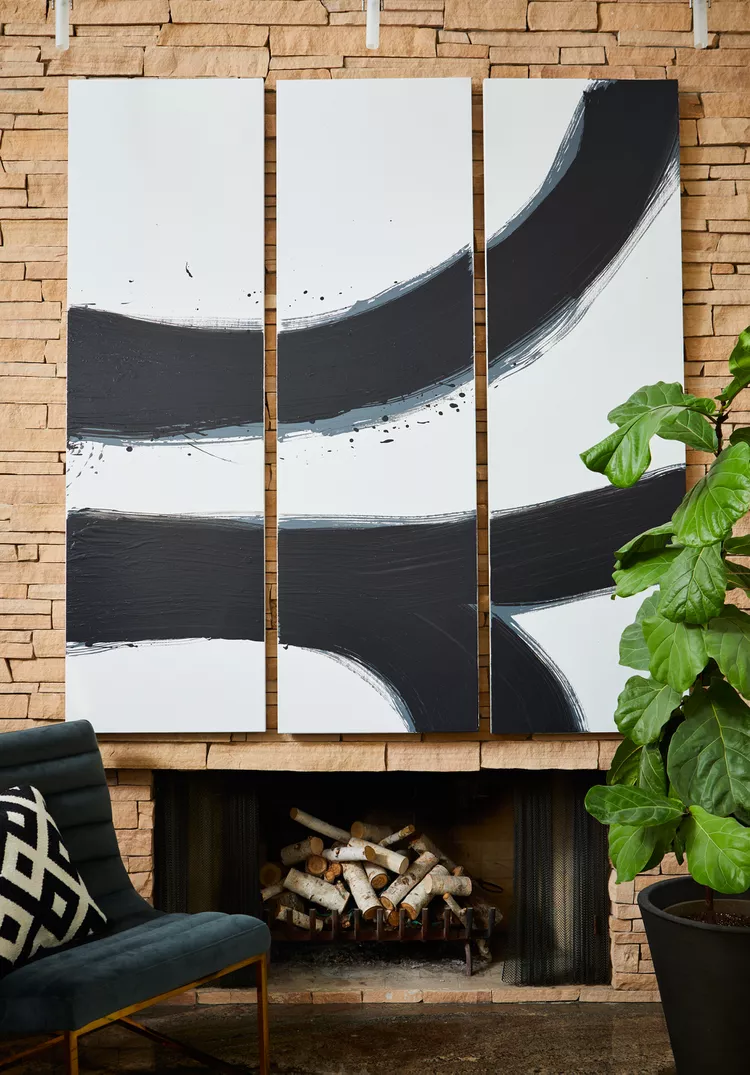
source: bhg.com
Make a statement artwork with a mop as a substitute brush on large-scale panels. High-contrast, flowing lines make a dramatic visual that appears gallery-worthy.
15. Add a Tile Backsplash
source: bhg.com
Use mesh-backed tile mats to complete a backsplash installation in one day. Apply, peel off liners, press tiles into position, then grout and clean.
16. Dress Up a Drum Shade
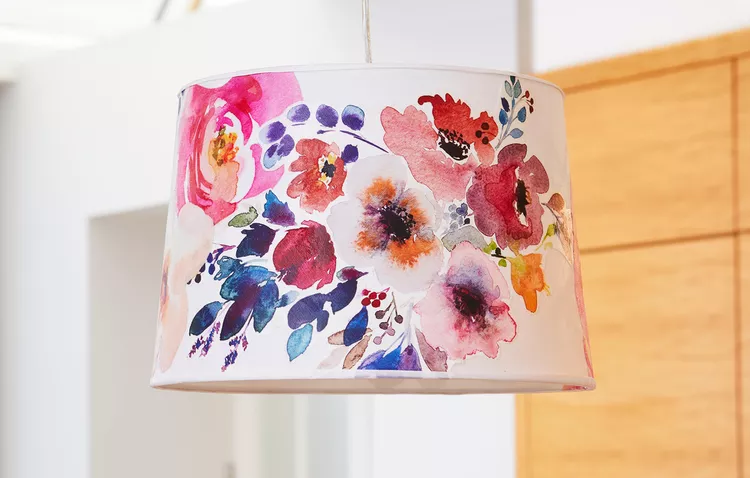
source: bhg.com
Give a plain drum shade a new life with flowered fabric. Simply glue your favorite designs over it for an instant beauty increase.
17. Organize Your Office
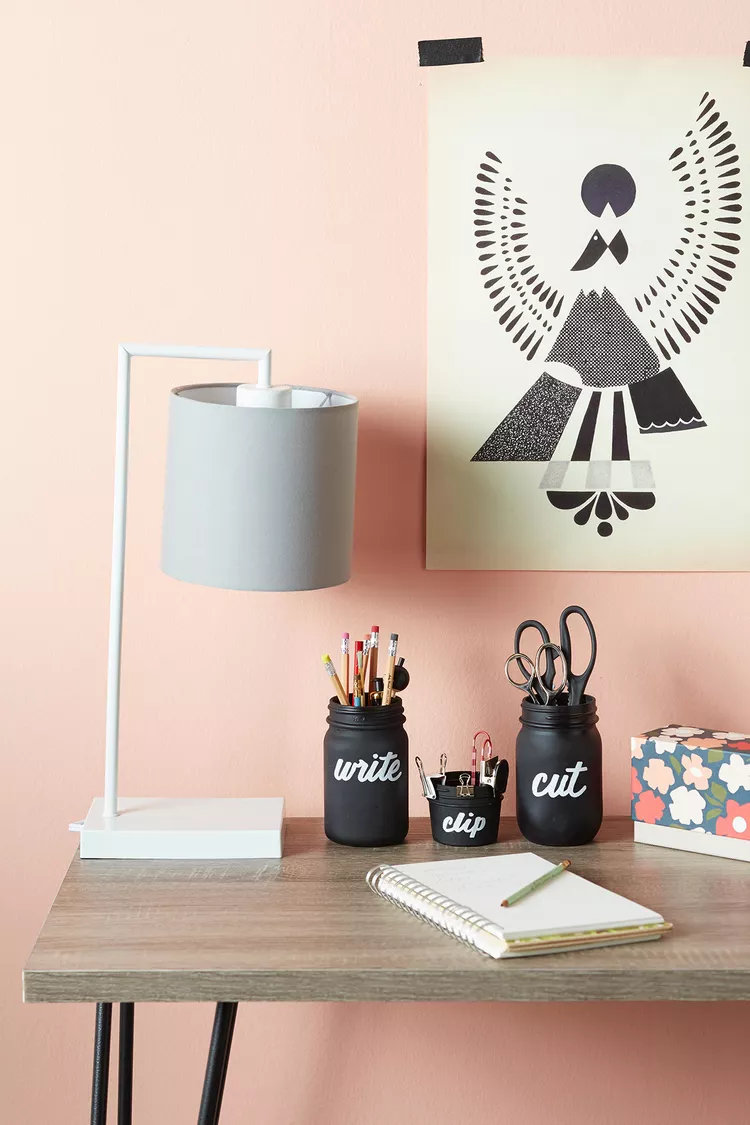
source: bhg.com
Transform glass jars into spray chalkboard paint and chalk pen label organizers. They’re simple, stylish supply or small item organizers.
18. Brighten a Bedroom
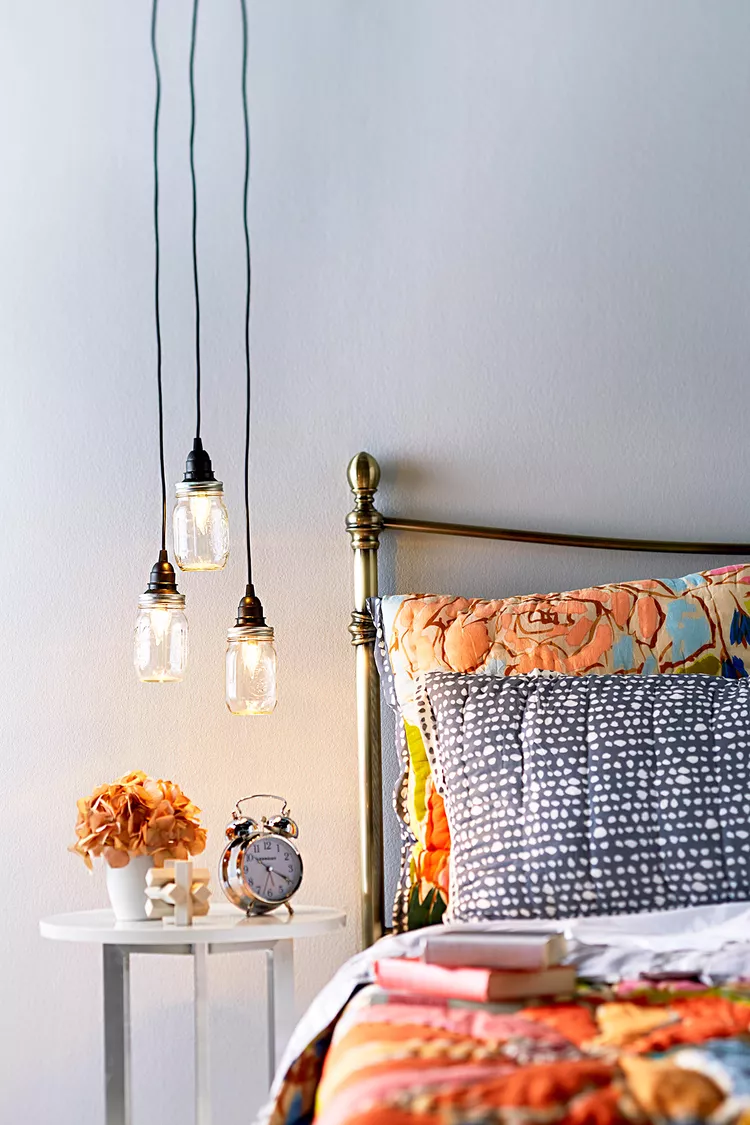
source: bhg.com
Add bedside illumination to mason jars with plug-in pendant sockets. Make a hole in the top, insert the socket, and hang from a hook—no installation of wired lighting necessary.
19. Snap Happy Display Board
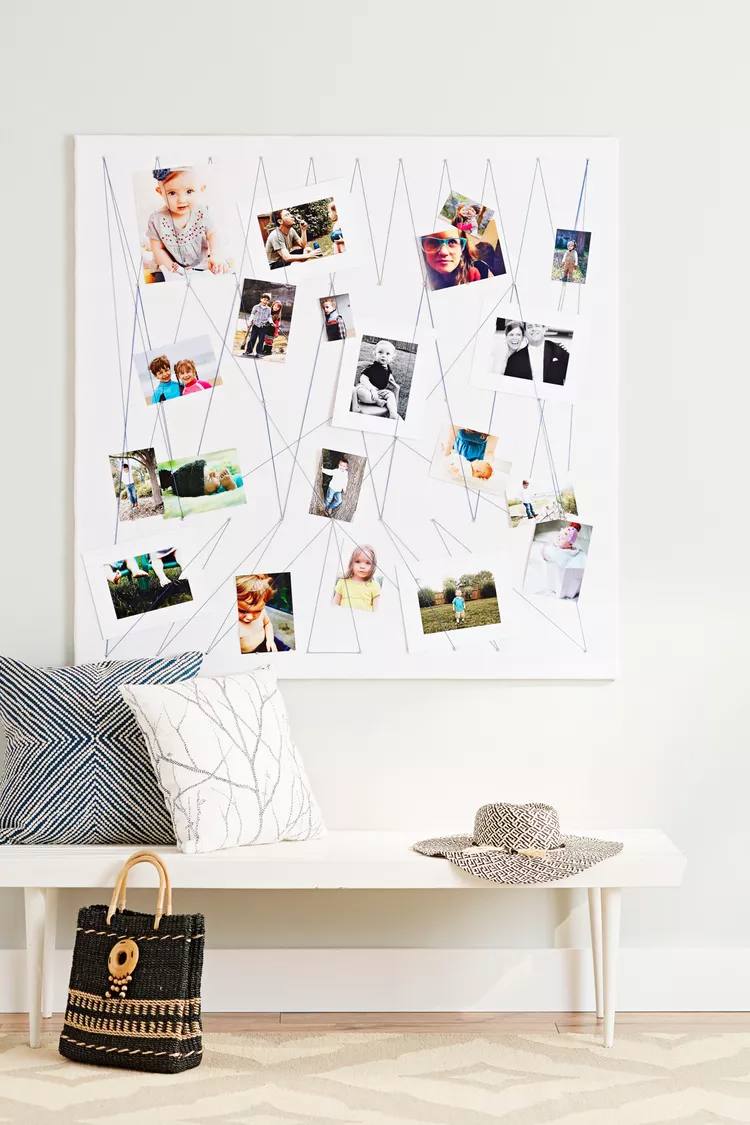
source: bhg.com
Make a fabric, corkboard, string, and tack textured photo frame. Staple fabric onto a board and weave string lines to hold pictures in an interesting grid.
20. Add an Area Rug
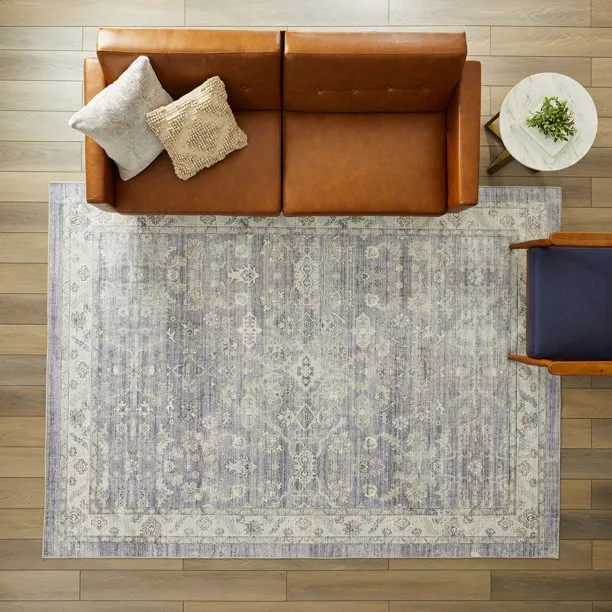
source: bhg.com
Instantly give a room a lift by rolling out a new rug. Consider size, shape, and material—washable rugs are great for heavy-traffic zones.
21. Punch Up Your Pillows
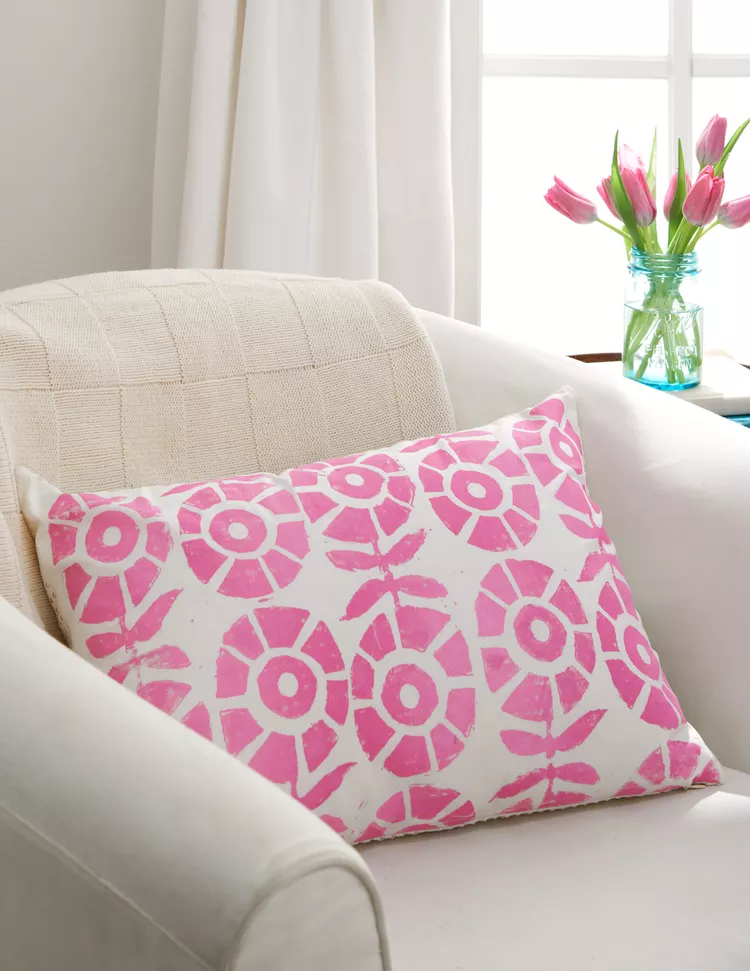
source: bhg.com
Add hand-stamped texture to pillowcases using screen‑printing ink and stamps. Insert cardboard into the case, stamp onto ink, repeat, and heat-set on the reverse with an iron.
22. Give Old Dining Chairs a Boost
source: bhg.com
Sand and prime wooden chairs, then paint them in a bold color. Recover the seats with fabric and polyfill for a fresh look.
23. Give Your Mantel a Makeover

source: bhg.com
Create « message-in-a-bottle » art by decoupaging photos onto glass bottles. Add handwritten messages inside and cluster on the mantel for a personalized display.
24. Dress Up Dining Linens
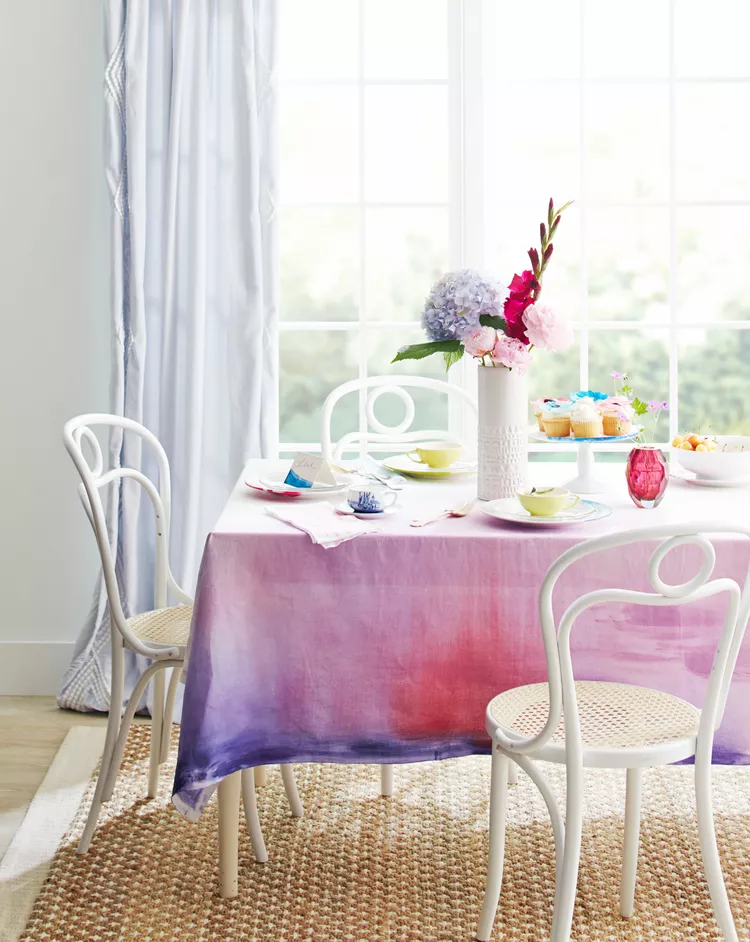
source: bhg.com
Paint a cotton tablecloth with thinned fabric paint. Use sweeping brushstrokes on wet fabric and blend colors for a soft, artistic appearance.
25. Refresh a Table Lamp
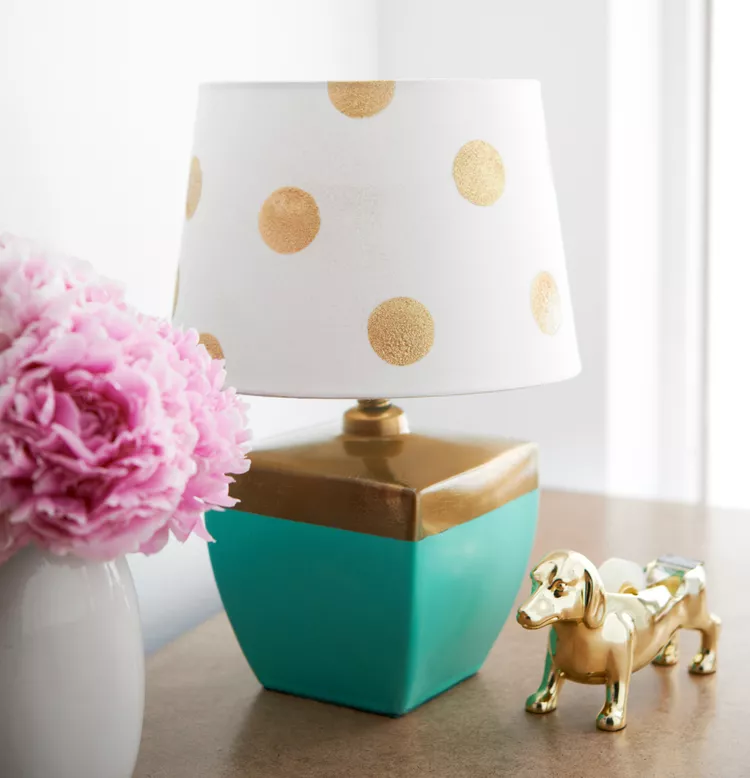
source: bhg.com
Refresh a lamp with metal details. Tape off sections of the base, paint, and seal. Paint cardstock stencils and glitter spray on the shade, then clear seal.
26. Perk Up a Tabletop
source: bhg.com
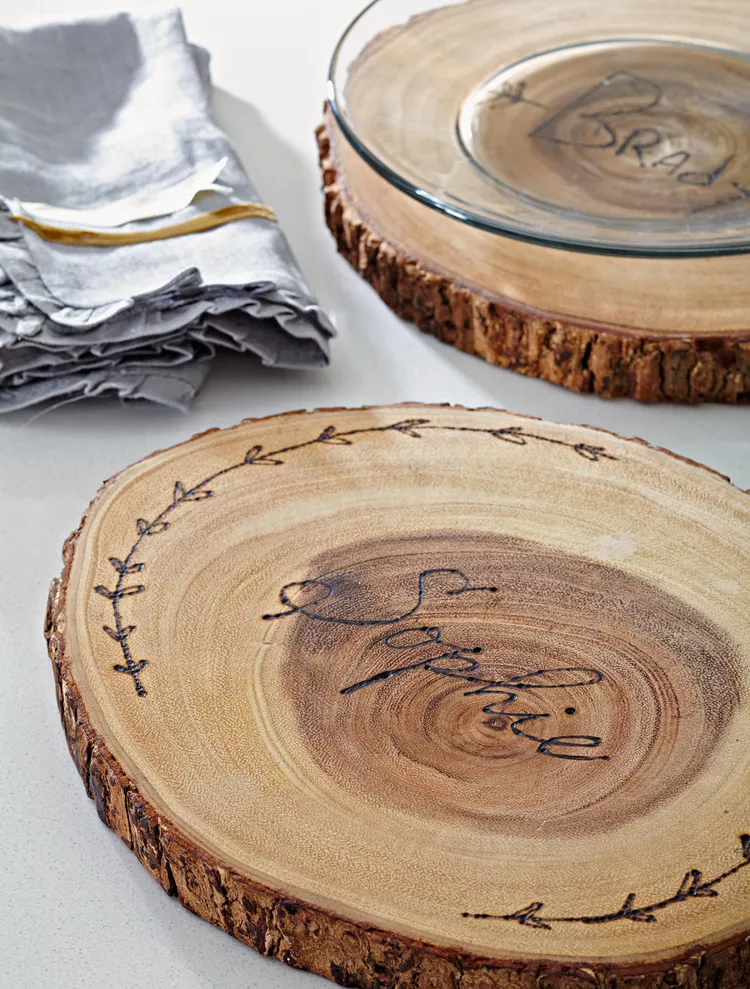
Give cut wood rounds a personal touch by burning in names or signatures using a woodburning tool—custom decor with meaning for your table or as gifts.
27. Update Your Entryway Planters
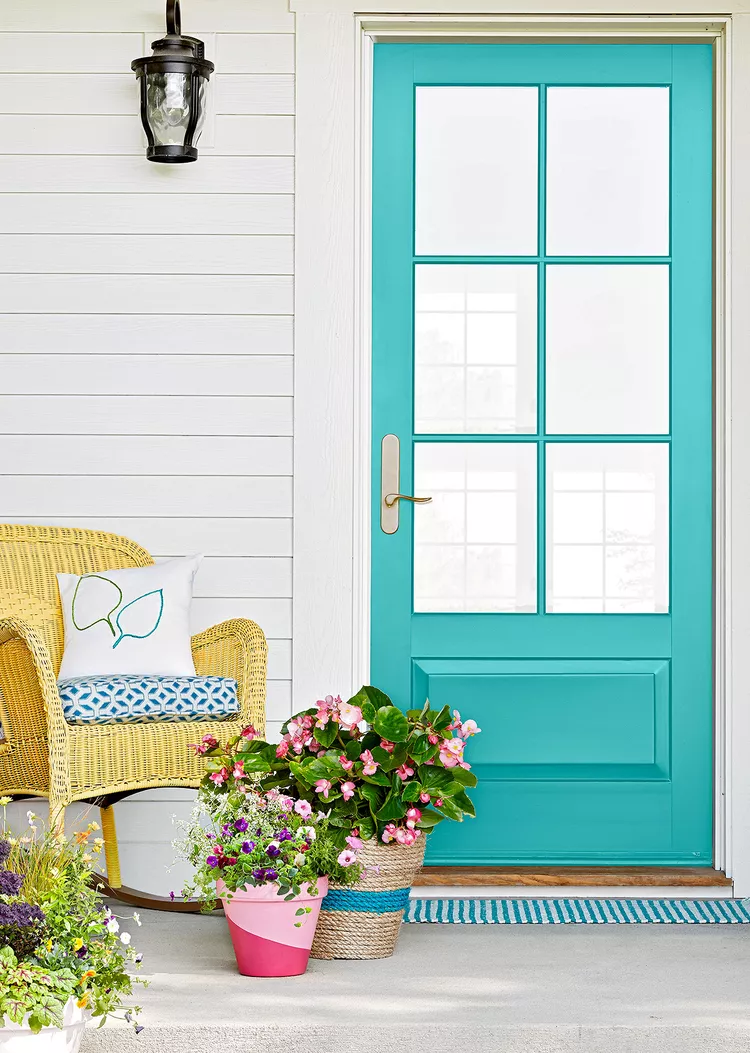
source: bhg.com
Color-block terracotta pots with two outdoor paints and painter’s tape, or wrap in rope for a simple, stylish entryway update.
28. Wow with Wall Art
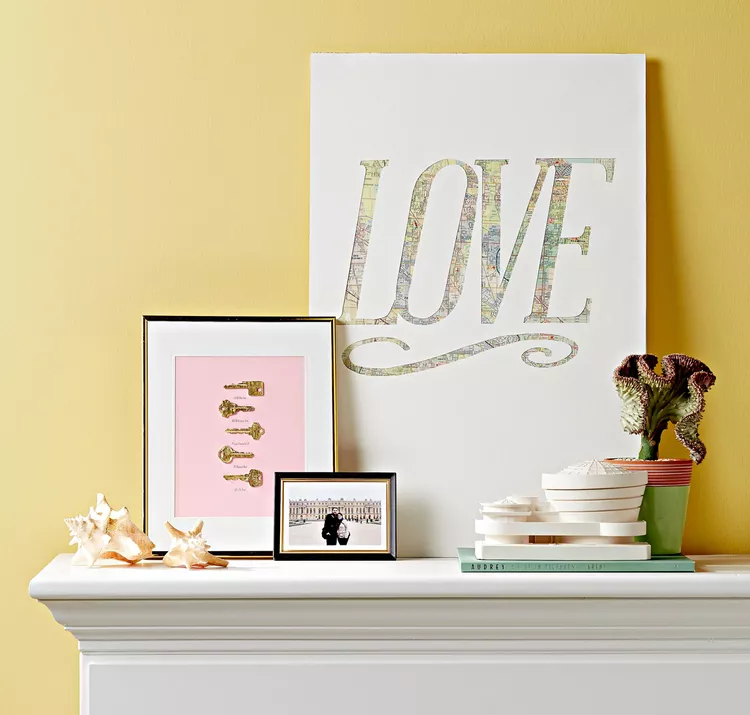
source: bhg.com
Adhere vintage maps to foam-core with rubber cement, letter phrases on watercolor paper, and cut and glue over the map for layered typography art.
29. Store Toys in Style
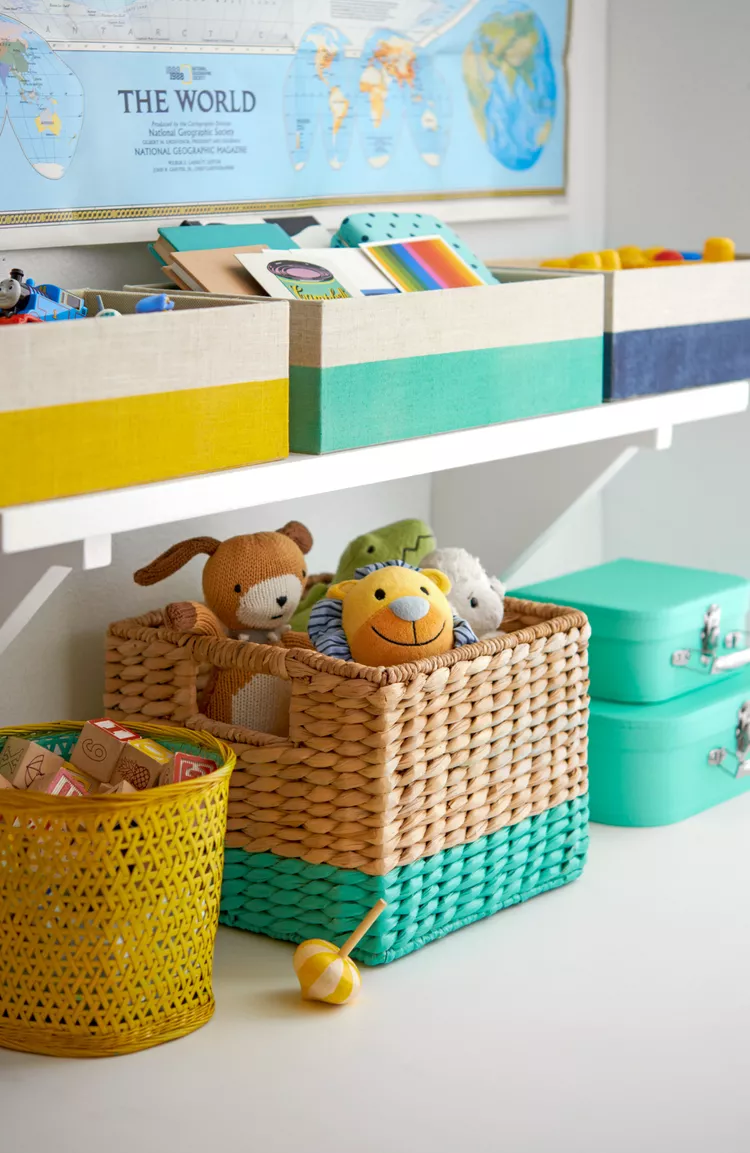
source: bhg.com
Breathe new life into storage baskets using spray paint and painter’s tape. Create stripes for visual interest and use various hues to designate baskets by family member—pre-reading skills, too!
30. Elevate a Serving Tray
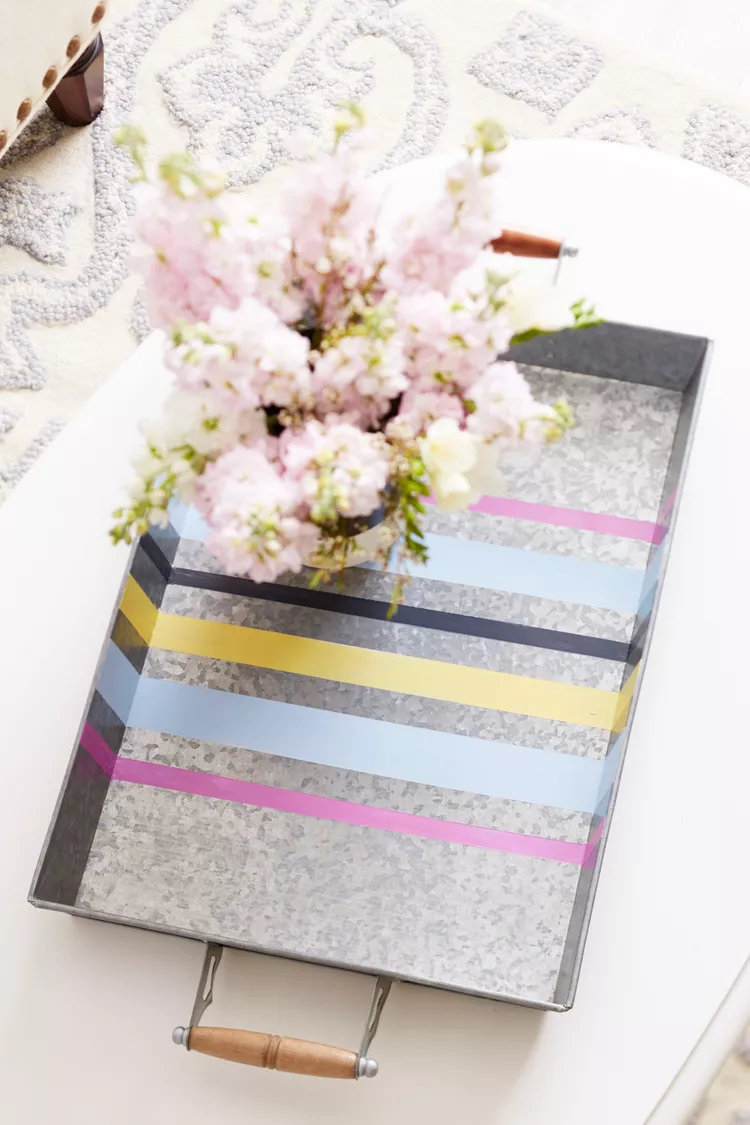
source: bhg.com
Transform an ordinary metal tray using painter’s tape to mask stripes or apply vinyl stencils for design. Uncover a sleek, polished appearance after the paint dries.