Follow our detailed, step-by-step photo tutorial to strip and refinish wood furniture, breathing new life into older or tired pieces with a bold, fresh finish.
Don’t toss that old piece of furniture out on the sidewalk or store it away to sell at a garage sale before considering its possibilities. Sanding and painting wooden furniture can completely give it a new life. This simple project is ideal for giving inexpensive second-hand or bargain-hunting flea market finds an updated new appearance. By removing old stain or paint, you create a blank slate for a new coat of bright color or an enduring neutral finish such as crisp white, which does not discolor.
Before beginning, remember that paint-stripping products contain strong chemicals and require caution. Always read and follow the manufacturer’s instructions for safe use. Use our guide to breathe new life into old furniture with a professional-looking update.
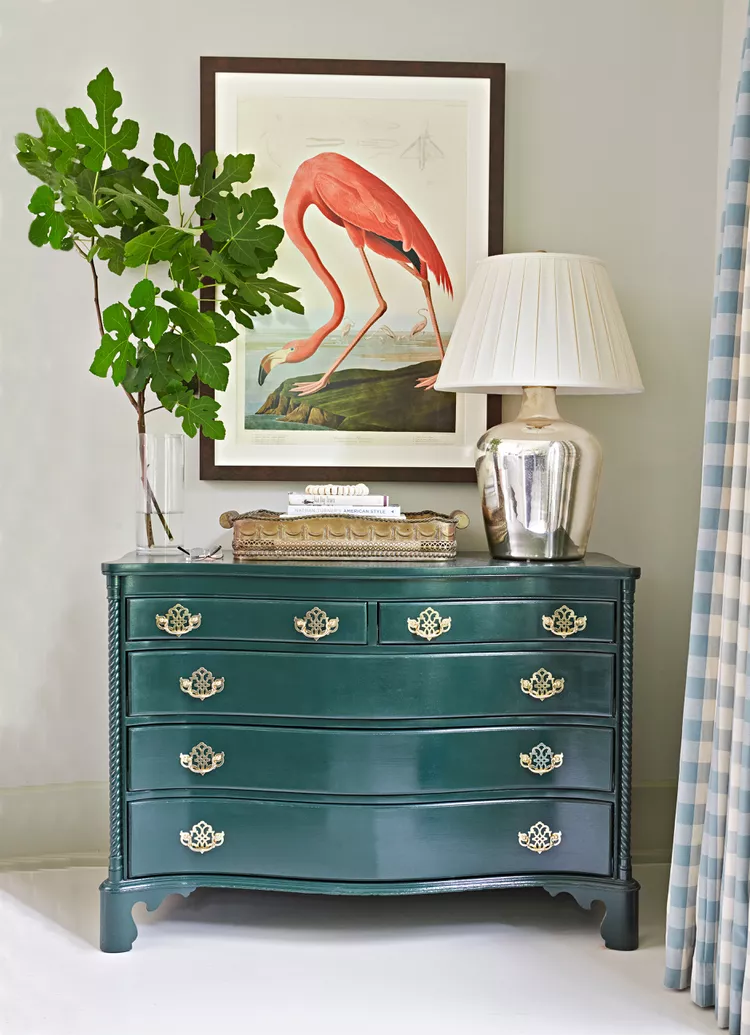
Credit: Kim Cornelison
What You’ll Need
Tools & Equipment:
Chemical-resistant gloves
Safety goggles
Paintbrush
Abrasive stripping pads
Sandpaper
Power sander or sanding block
Materials:
Wood filler
Paint and varnish remover
Odorless mineral spirits
Painter’s tape
Stain-blocking primer
Paint
Clear polyurethane
How to Strip and Repaint Wood Furniture
Note: Chemical strippers are best on small to medium projects. On large items like cabinets, use a heat gun or get a professional to do it.
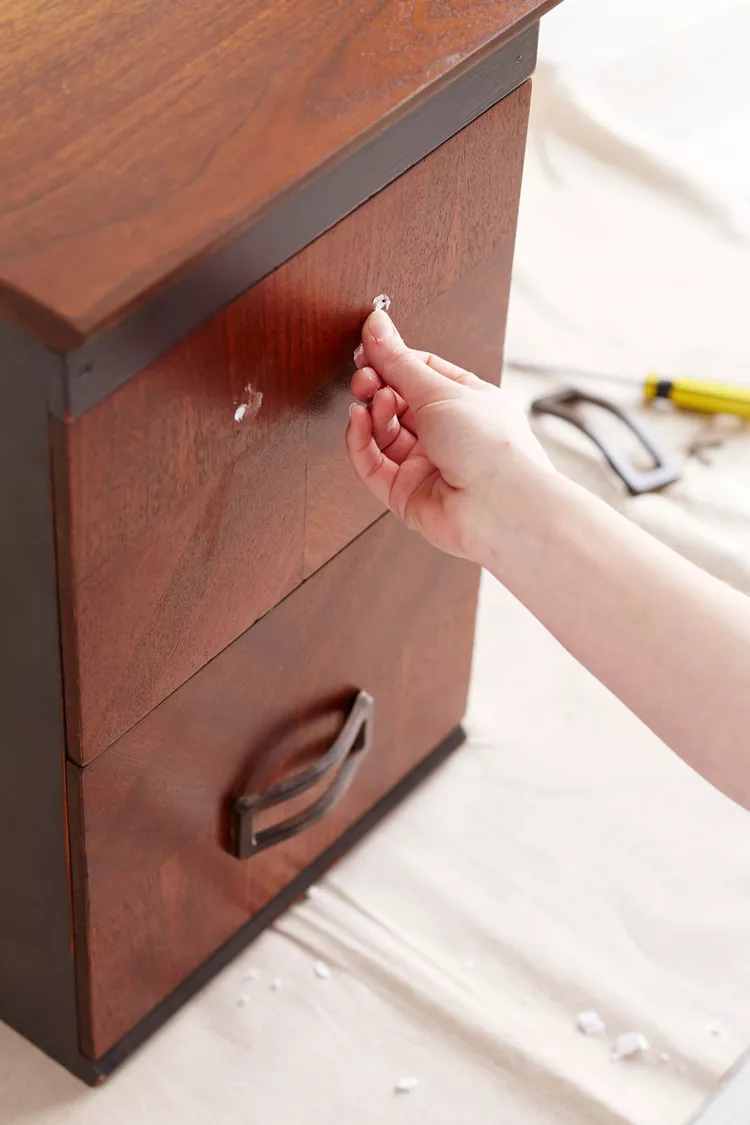
1. Get the Furniture Ready
Credit: Adam Albright
Remove all hardware from the furniture. Fill holes or dents with wood filler. Sand lightly on all surfaces you plan to paint. Optional: Add furniture feet for extra height or pizzazz.
2. Strip Off the Paint
Put on your chemical-resistant gloves and eye safety goggles. Work in a well-ventilated area and place the furniture on a leak-proof drop cloth. Use a brush to apply paint and varnish remover, according to product instructions. Clean hard-to-reach surfaces like turned legs with abrasive pads dampened in mineral spirits.
3. Sand the Wood
After stripping, sand all surfaces thoroughly, always along the wood grain. Use coarse grit sandpaper to strip off residue, then switch to fine grit paper to get a smooth finish. Use a tack cloth to clean off everything to wipe away dust.
4. Prime the Surface
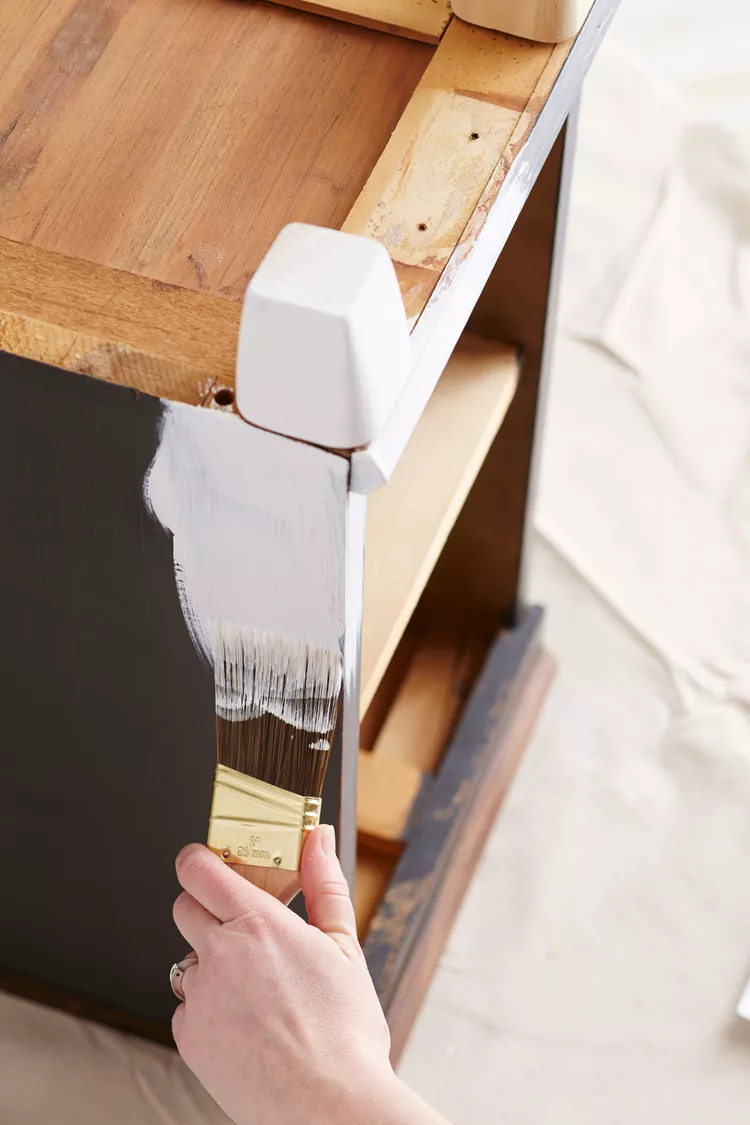
Credit: Adam Albright
Mask off parts that don’t want to be painted with painter’s tape. Use a stain-blocking primer to seal the wood so stains don’t seep through. Allow the primer to completely dry before applying it in thin coats with plenty of time between each coat for it to completely dry. Sand lightly between coats to reduce brush marks.
5. Paint the Furniture
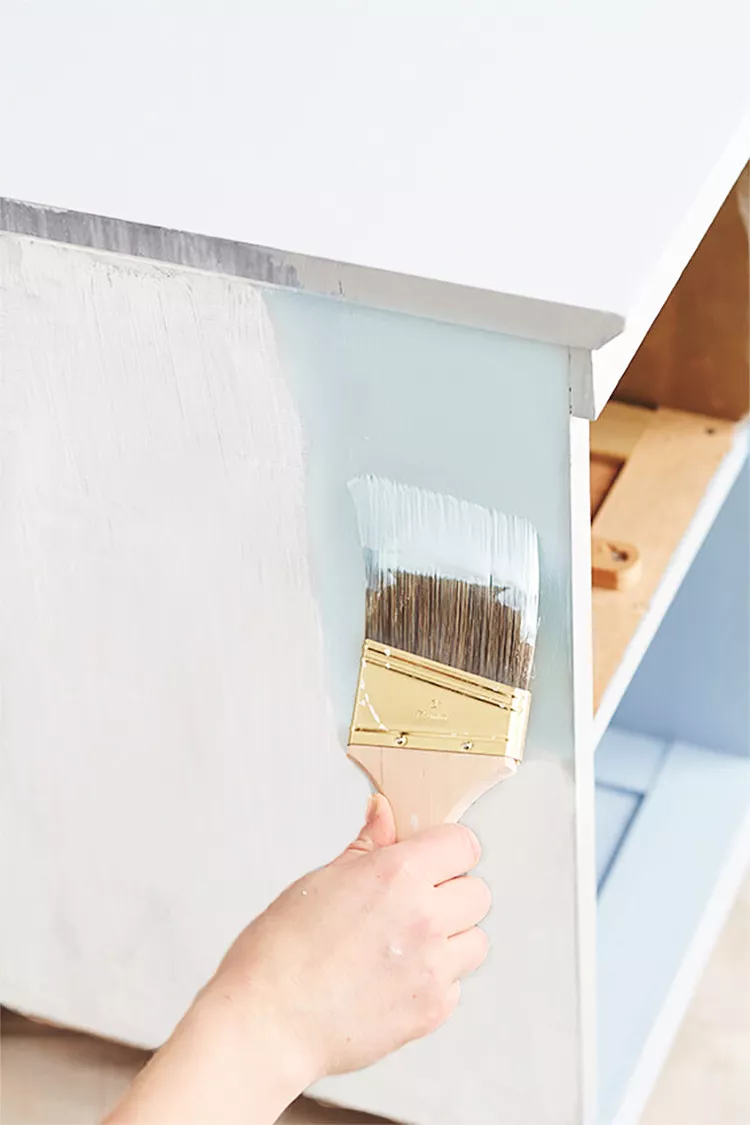
Credit: Adam Albright
Apply at least two thin, even coats of paint, allowing complete drying time between applications. After completely cured paint, top with a clear polyurethane for added durability. Complete your project by installing new hardware if desired.