Luxury or budget-friendly, every mattress needs regular cleaning to stay fresh and allergen-free. Here’s how to do it like a pro.
The mattress is supposed to be a safe and comfortable place to sleep on, but as time goes by, it collects a lot of dust, dead skin, and dirt and becomes stained. For people suffering from allergies or who have pets, keeping the bed clean is essential for a good night’s rest. Fortunately, it is easier than expected to clean a mattress. With 9 simple steps as advised by Ed Curry, president of Duxiana, and Neil Parikh, cofounder of Casper, your mattress will be as good as new in no time.
Why Clean Your Mattress?
Key points: mattress cleaning benefits, dust mite prevention, allergy-friendly sleep
A dirty mattress can lead to increased allergens, dust mites, and even bacteria that can result in an unhealthy environment which decreases the quality of sleep and increase the risk of health problems. Keeping your mattress clean will result in having a mattress that lasts longer, and is more pleasant to sleep on.
Step 1: Gather Your Supplies
Key points: mattress cleaning tools, DIY cleaning supplies, eco-friendly cleaning
Before you start, assemble the following:
- Vacuum with an upholstery attachment
- Enzyme cleaner or dish soap (for stains)
- Laundry detergent
- Baking soda
- Clean cloths
- Cold water
Step 2: Strip the Bed and Wash Bedding
Key points: washing bedding tips, hot water for dust mites, pillow cleaning guide
Remove all sheets, pillowcases, and mattress protectors. Wash them in hot water to kill dust mites. Check pillow care labels to see if they’re machine-washable.
Step 3: Vacuum the Mattress
Key points: vacuuming mattress tips, removing dust from seams, upholstery attachment use
Take out all sheets and pillow covers together with mattress coverings, wash in hot water to eliminate any dust mites. Always check the label for care instructions to see if your pillow is machine washable.
Step 4: Spot-Clean Stains
Key points: mattress stain removal, enzyme cleaner tips, DIY stain solutions
Never soak your mattress or apply water directly. Instead:
- For biological stains (blood, sweat, urine), use an enzyme cleaner. Spray it onto a clean cloth, then blot the stain.
- For DIY solutions, mix dish soap with water (use only the foam) or combine equal parts cold water and hydrogen peroxide.
- Blot gently with a damp cloth to lift the stain, using minimal moisture.
Step 5: Sprinkle Baking Soda
Key points: baking soda for odor removal, natural mattress freshener, UV light benefits
Liberally sprinkle baking soda over the mattress and remember not to pack it down. Allow it to sit for a few hours or even overnight so any moisture or odors from the mattress can be absorbed. Ensure that the windows are open to let fresh air in as it helps in killing bacteria and mold.
Step 6: Vacuum Again
Key points: removing baking soda, final vacuuming tips, fabric headboard cleaning
Using a high-quality vacuum cleaner, submerge all the remains of the baking soda that are left over the mattress. Don’t forget to vacuum the fabric headboard as well if you have one.
Step 7: Flip and Repeat
Key points: flipping mattress benefits, rotating hybrid mattresses, mattress maintenance
Depending on how new or old your mattress is, flip or rotate your mattress. Check the manufacturer guidelines beforehand. You need to repeat steps 1 to 6 on the other side as well. For hybrid or foam mattresses, rotating 180 degrees every few months is often sufficient.
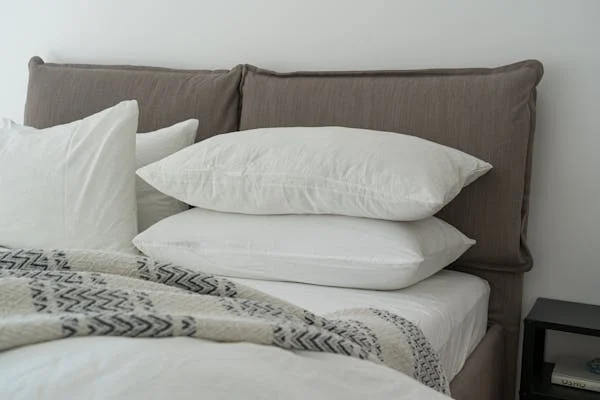
Step 8: Protect Your Mattress
Key points: mattress protector benefits, spill-proof bedding, bed bug prevention
When the mattress is dry, be sure to immediately cover it with a mattress protector . This acts as a barrier against spills, dirt, and even bed bugs which helps in making the next cleaning easy.
Step 9: Use Fitted Sheets and Encasements
Key points: dust mite prevention, allergy-proof bedding, mattress encasement tips
« Using fitted sheets that are cleaned regularly and maintaining a clean space surrounding the mattress will guard it from dust.” As with most things, an ounce of prevention is worth a pound of cure. For people who suffer from allergies, consider using a mattress encasement. Just make sure it is loose and flexible enough for your sleeping position.
When to Replace Your Mattress
Key points: mattress lifespan, signs to replace mattress, body impressions and sagging
Even with regular cleaning, mattresses don’t last forever. After about eight years, or if you notice sagging, body impressions, or persistent discomfort, it’s time to invest in a new one. “Waking up in pain or sleeping poorly every night are signs that it’s time to move on,” says Neil.
Sleep Easy on a Clean Mattress
Regular mattress cleaning not only extends its life but also ensures a healthier, more comfortable sleep environment. By following these steps and adopting preventive measures like mattress protectors and encasements, you’ll enjoy a fresher, more restful night’s sleep.
Key points: eco-friendly mattress care, sleep hygiene tips, mattress maintenance guide
Note: Always check your mattress manufacturer’s care instructions before cleaning. For severe stains or persistent odors, consider professional cleaning services.
