Craft wall décor, stylish coasters, or even preserve meaningful photographs—all with resin. This versatile medium allows you to transform everyday items into beautiful keepsakes.

Credit: Nicolas Gourguechon
Resin crafting is a rewarding way to channel your creativity. Using a mix of epoxy resin and hardener, you can achieve a glass-like finish over nearly any surface—perfect for everything from wall art and tabletop accents to photo preservation.
Getting Started with Resin Crafts
Though resin is beginner-friendly, proper prep is essential. Have your tools and workspace ready before mixing.
• Cover your work area in a dust-free room (ideally 65–70°F) with heavy plastic.
• Wear old clothes, latex gloves, and use disposable stir sticks and cups for easy cleanup.
• Use a level for flat projects to ensure even resin distribution.
Once your workspace is ready, begin with simple crafts like glossy coasters or wall art. Most resin kits include enough material for multiple projects, giving you plenty of practice.
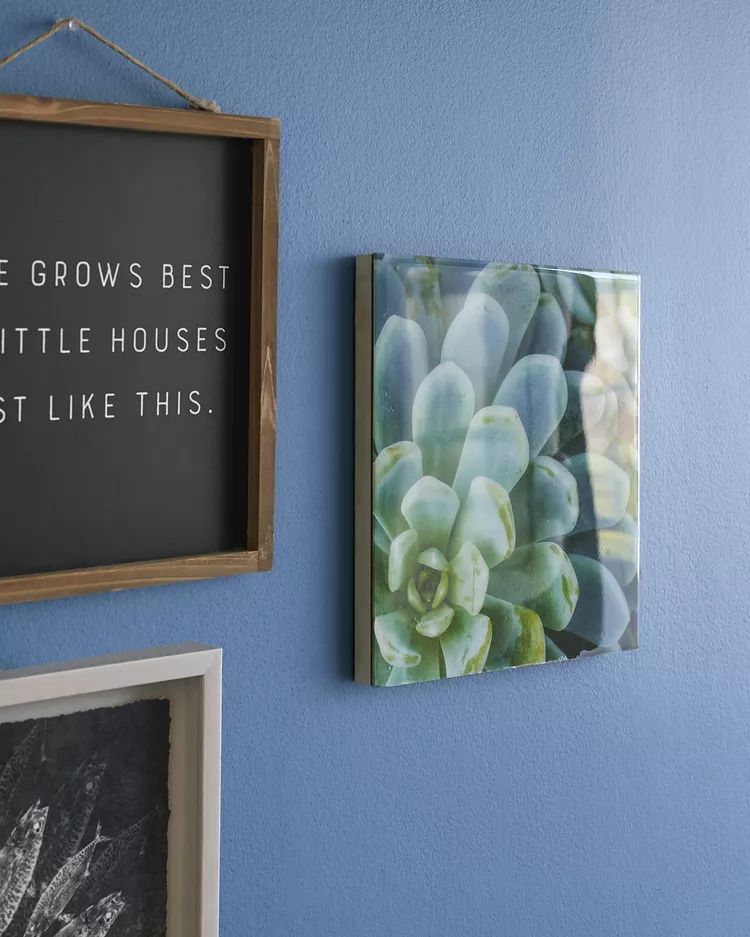
1. Glossy Impact
Credit: Nicolas Gourguechon
Art paper, canvas, and resin come together to create polished wall art, like this large succulent print.
• On a protected, level surface, attach art paper to a 10″x10″ canvas with Mod Podge.
• Apply another layer over the top, smooth out bubbles, and let it dry.
• Pour clear resin into the center and allow it to spread. Smooth edges with your finger. Dry for 24 hours under an upside-down plastic tub or box to keep dust out.
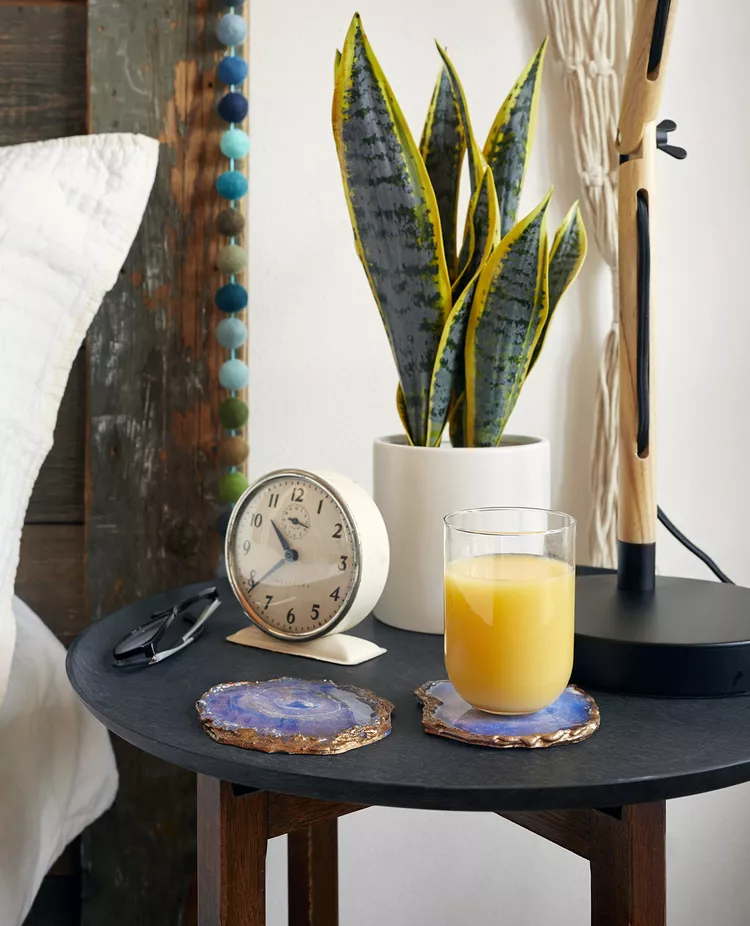
2. Rocky Coast Coasters
Credit: Nicolas Gourguechon
Inspired by geodes, these resin coasters are a great entry-level project.
• On a silicone mat, use a glue gun to outline a rock shape. Layer glue to form a raised edge, adding glitter or stones if desired.
• Mix clear resin with a few drops of acrylic paint in individual cups.
• Pour one color into the center and follow with others for a marbled look.
• Swirl with a stir stick, use a heat gun to blend, and remove bubbles.
• Let dry, then paint edges gold and attach felt to the bottoms.
3. Making Waves

Credit: Nicolas Gourguechon
Capture the ocean’s essence with resin and paint on canvas.
• In separate cups, mix clear resin with deep blue, teal, light blue, and white paint.
• Pour resin onto the canvas in stripes. Use your finger to gently mix, then apply a heat gun to blend.
• Add white for foam, sprinkle glitter, and cover to dry for 24 hours.
• Finish with a thin frame to hide drips and add polish.
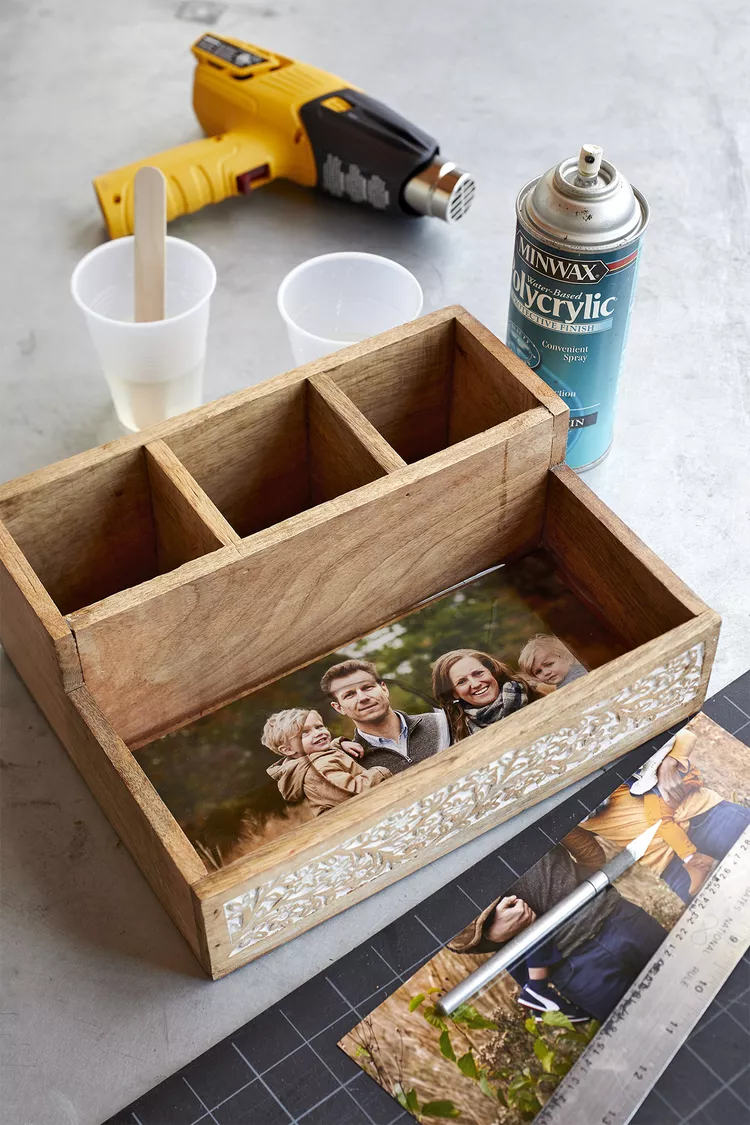
4. Resin Photo Art
Credit: Nicolas Gourguechon
Resin makes a striking and lasting way to display cherished photos.
• Trim your photo to fit a mold or surface. Pour resin over it, spreading evenly.
• Use a heat gun to remove bubbles, then let dry. Try it on a jewelry box for a personal touch.
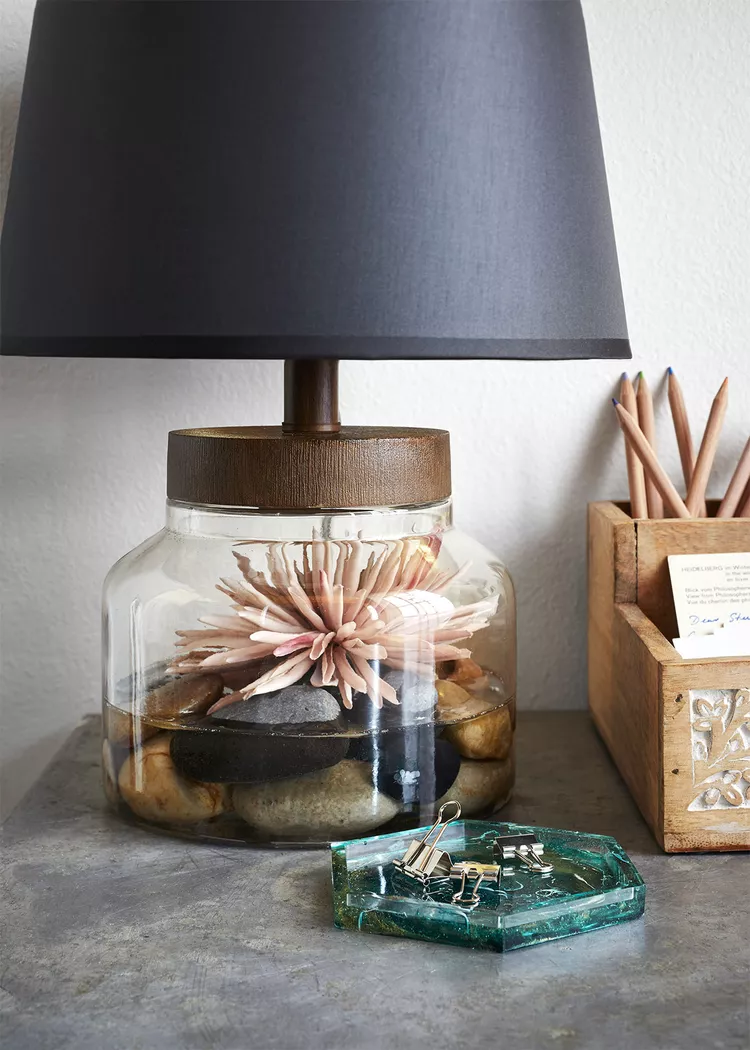
5. River Still Life Lamp
Credit: Nicolas Gourguechon
Recreate the river rock trend inside a clear lamp base.
• Wash and dry river rocks. Fill a lamp base with them.
• Pour resin between rocks to hold them in place.
• Add a poly-sealed artificial flower. Let dry completely before use.
6. Cube Resin Craft
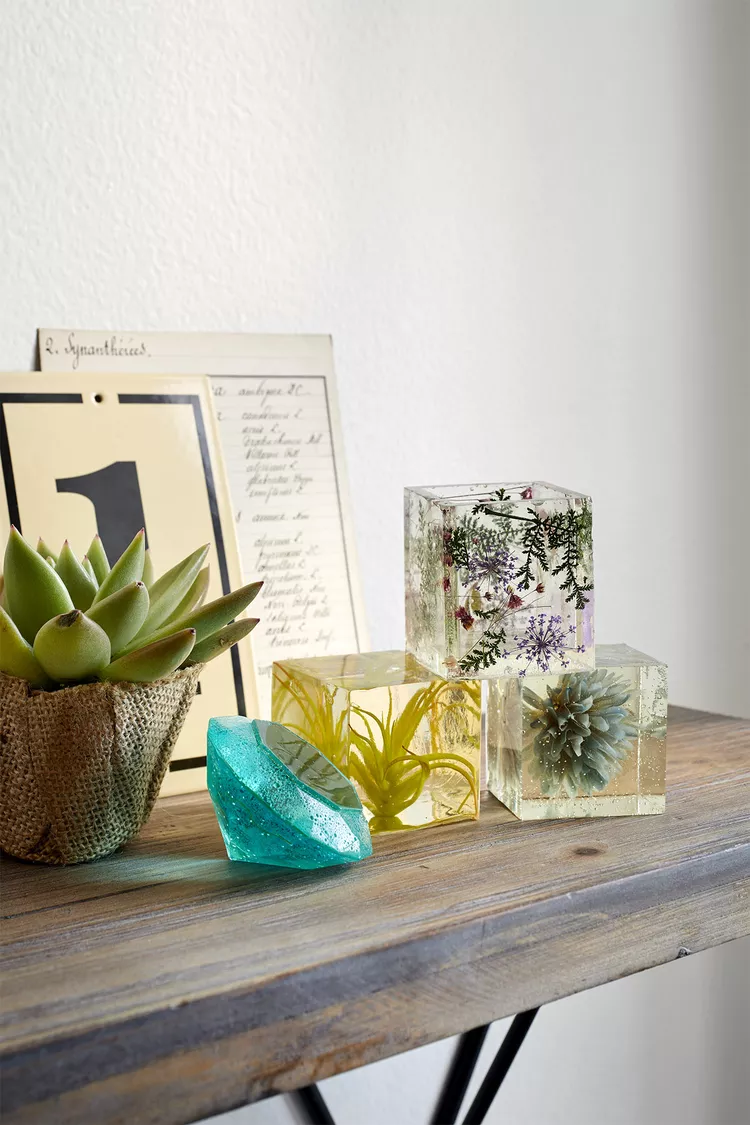
Credit: Nicolas Gourguechon
Preserve faux or dried flowers in a resin cube.
• Center your item in a square mold.
• Warm resin with a heat gun before pouring to prevent bubbles.
• Let dry 24 hours, then demold. For small items, insert into the resin after pouring.
7. Sweet Accents
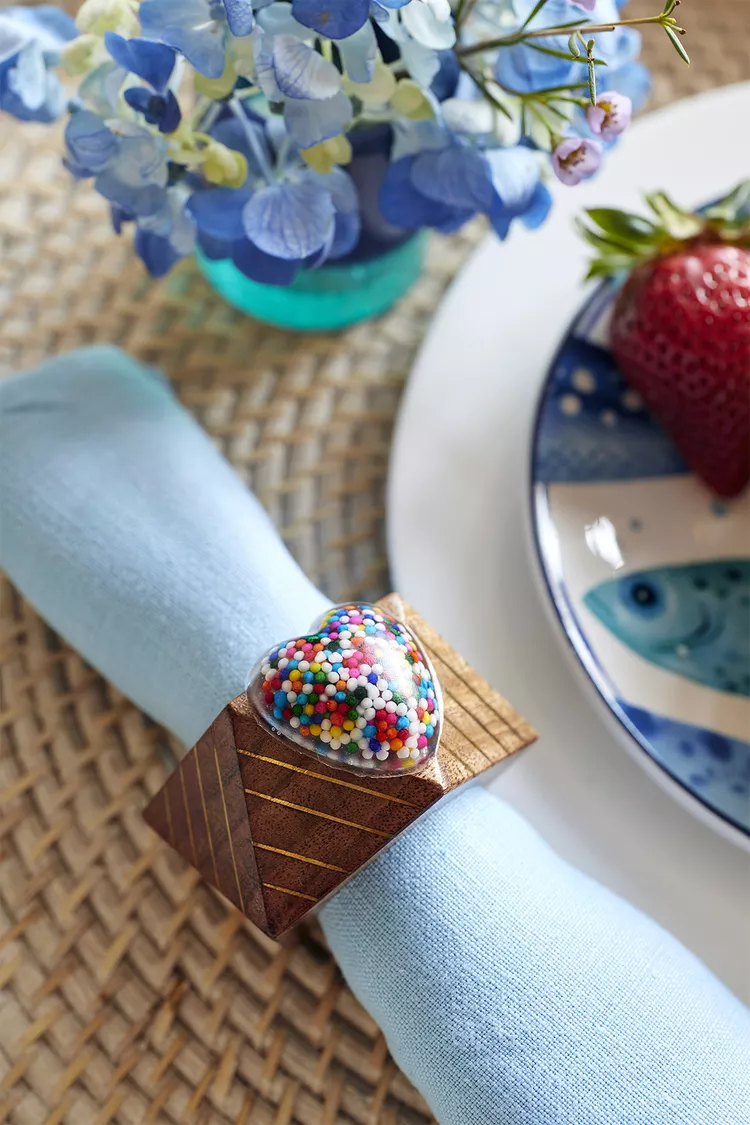
Credit: Nicolas Gourguechon
Make playful napkin rings using candy molds and sprinkles.
• Fill molds with sprinkles, pour resin over, and attach to wooden rings. Great for Valentine’s Day or birthdays.
8. Doodle Resin Craft
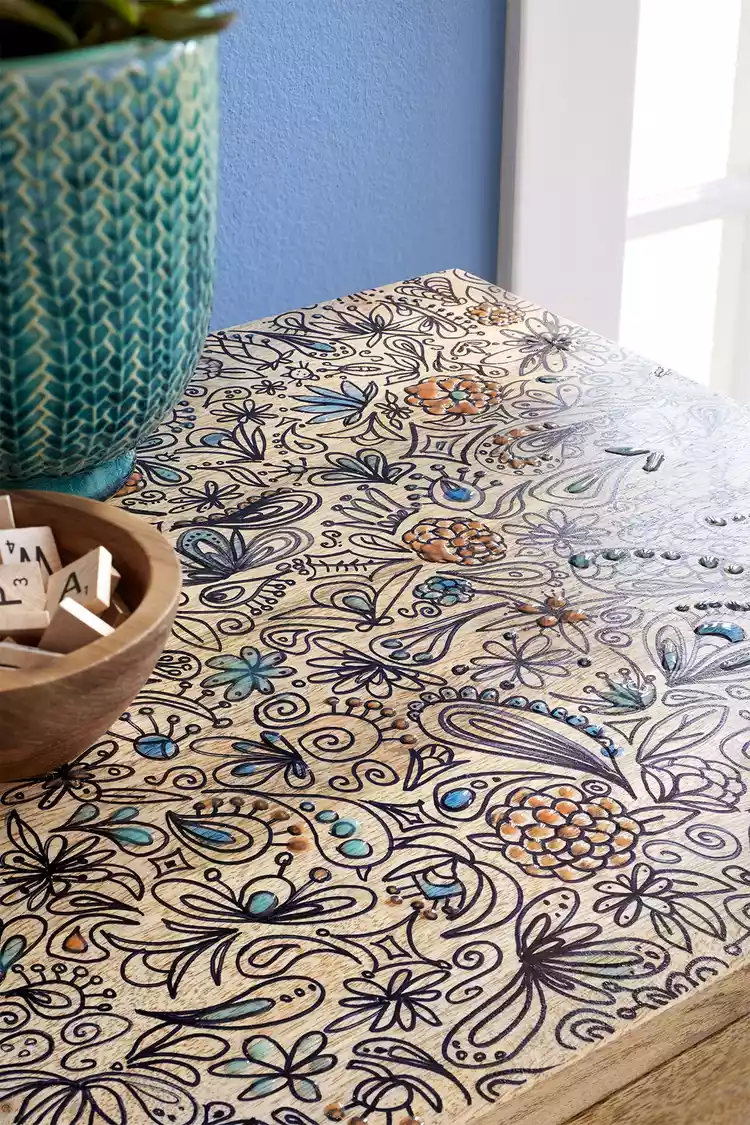
Credit: Nicolas Gourguechon
Add hand-drawn style to surfaces with resin.
• Sketch shapes with a marker or use stencils.
• Fill designs with tinted resin using a brush tip for dimensional detail.
9. Resin Buttons
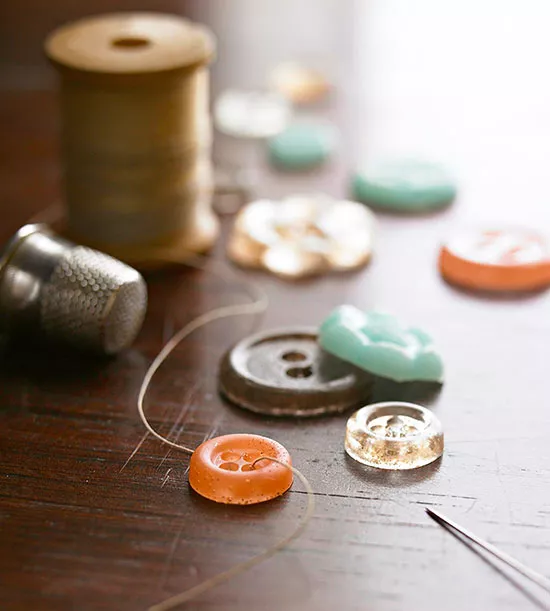
Source: bhg.com
Create your own buttons for pillows or clothing.
• Use button molds and color your resin with acrylic paint.
• If needed, poke holes before fully cured. Otherwise, let set 24 hours and pop out.
10. Napkin Rings with Resin Flowers
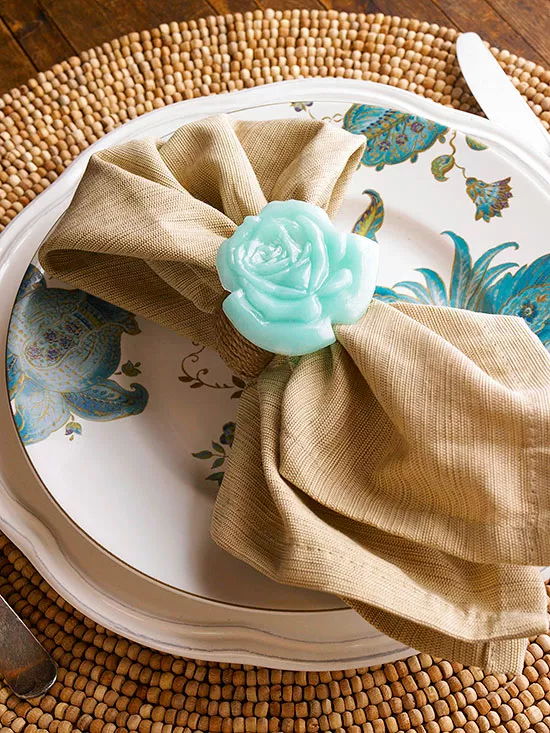
Source: bhg.com
Add floral flair using fondant molds.
• Color resin, pour into molds, and let partially set.
• Bend the still-flexible flower over a ring and glue. Let finish drying.
11. Floral Cabinet Knobs
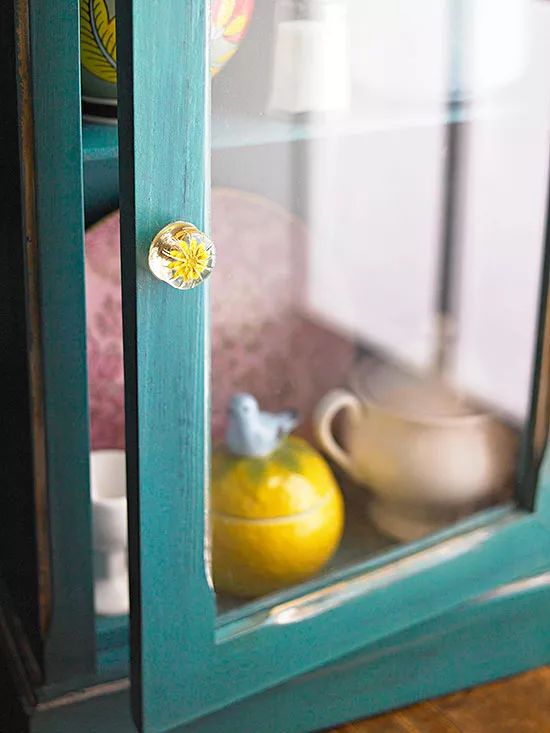
Source: bhg.com
Make custom knobs using a contact lens case as a mold.
• Add resin and embed vintage jewelry pieces.
• Insert a screw while resin is tacky.
• Once dry, add a nut to space the knob from the drawer.
12. Decorative Door Knob

Source: bhg.com
Give your doorknob a unique twist.
• Cut scrapbook paper to fit and decoupage onto the knob.
• Add a charm or jewel in the center.
• Pour resin over and let cure flat for 24 hours.
13. Picture Frame in Resin
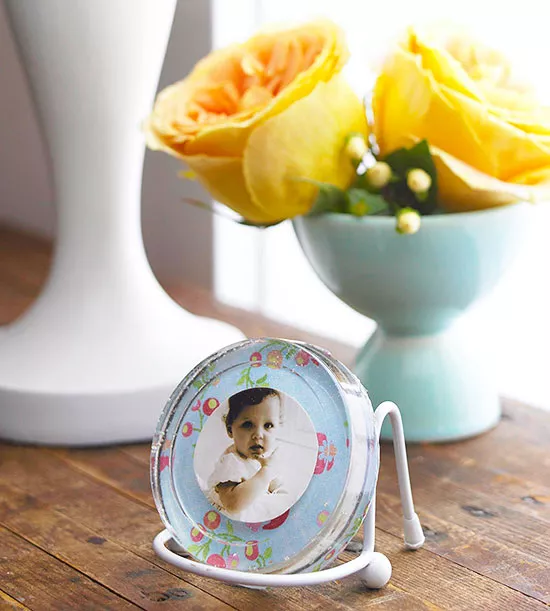
Source: bhg.com
Preserve a photo in a DIY resin frame.
• Back the photo with thick paper and seal both sides.
• Place into a soap mold with resin. Let dry, then back the frame with decorative paper.
• Display on a mini easel.
14. Floral Paperweight
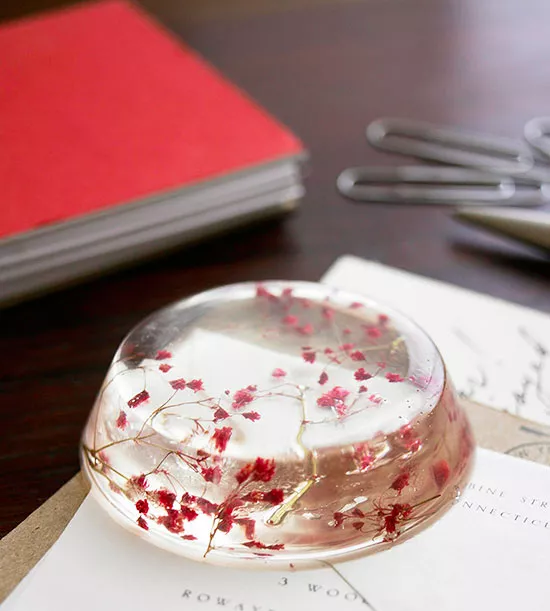
Source: bhg.com
Craft an elegant resin paperweight with dried flowers.
• Pour resin into a bowl mold and float dried blooms at different depths with a toothpick.
• Let dry, then remove and place on your desk.
15. Sun-Catching Mobile
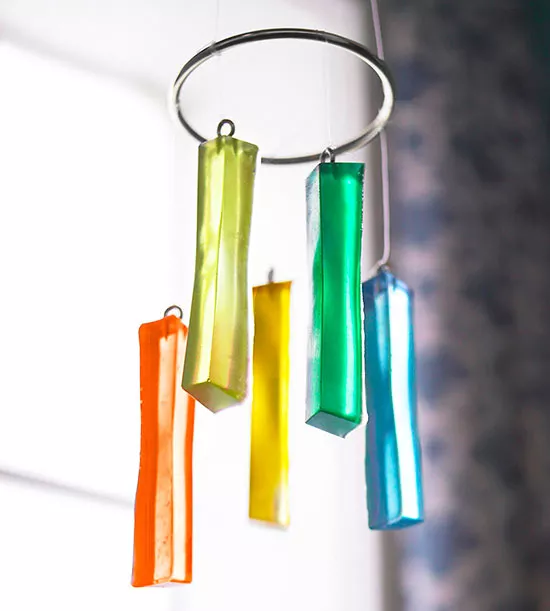
Source: bhg.com
Brighten any space with this colorful resin mobile.
• Use ice cube trays as molds. Mix food coloring into resin and pour.
• Once cured, screw in small hooks.
• Hang from fishing line on a metal ring in a sunny window.